Authenticates vSmart controllers and routers to the SD-WAN domain.
Orchestrates connectivity between Routers and Controllers (vSmart).
All SD-WAN devices MUST connect directly to vBond.
This requires publicly accessible IP address.
ie. cannot be behind a NAT unless a 1:1.
DTLS
vBonds keep continuous DTLS tunnel established from vBond to each vSmart controller.
When SD-WAN vEdge or cEdge comes online, they are configured to reach out to vBond via DTLS Tunnel. This facilitates authentication and joining the network with the vSmarts.
Authentication performed via certificates.
NAT Traversal
vBond is middle man for SD-WAN devices authenticating and joining network.
vBond allows all other SD-WAN devices to be behind NAT without issue.
Load Balancing
vBond automatically load balances between vSmart controllers as SD-WAN edges come online.
Border of SD-Access fabric to all other internal networks
In and out of Fabric.
When a PC in the SD-Access fabric tries reaching shared services, it will query the control plane node (LISP MS/MR) and find out it needs to go to the internal border node. The internal border node has an eBGP peering setup with the fusion router which allows the reachability to the Shared Services block.
The internal border node is redistributing BGP into LISP and vice versa.
Default Border Node:
Border of SD-access fabric to all other networks that are not internal networks.
ie. vendors, internet, etc. Similar to default Route.
Also known as PXTR
Anywhere Border Node:
Can serve as both Internal and Default border node.
Note – According to Cisco Webinars, the underlay is already built in the CCIE Lab.
Manual:
Overlay can run over any type of underlay.
Can be Layer 2 or Layer 3
Highly recommended layer 3.
‘Lean and Mean’ underlay.
Spanning Tree is still needed if layer 2 is used as underlay.
Routing Protocol
Cisco recommends IS-IS.
Can be different routing protocol, commonly using different routing protocol if brown field.
SD-Access supports EIGRP, OSPF, and IS-IS.
Each edge device must advertise loopback interfaces into underlay.
Loopbacks are used to form VXLAN tunnels.
Shared Services
DHCP, DNS, Domain Services, DNA Center, WLC.
These services sit outside of fabric domain.
Underlay needs to be routable to shared services.
ie. to internal border node.
0.0.0.0/0 will not work unless internal and external border node are same device.
MTU
VXLAN requires an extra 50B for header.
54B if there’s a VLAN tag.
Cisco Recommends MTU of 9100B for the entire underlay.
Can be devices not running as edge or border node
Middle ‘routing’ devices such as older switches just passing traffic.
Underlay link connectivity
P2P links between each switch in underlay.
Recommends 10Gbps of throughput between each switch.
TIMERS
DO NOT CHANGE IGP TIMERS.
Use BFD to improve failure detection.
None of this is necessary if Greenfield – use LAN automation with factory default IOS-XE switches. LAN Automation will build out IS-IS underlay.LAN Automation
LAN Automation:
Initial task is running discovery to import a Border node into inventory.
Once a border node is added to inventory, DNA can hop from the border node into neighboring devices to auto configure underlay.
Note – ‘ip routing’ needs to be configured on seed/border node before starting LAN automation.
Border is actually behind the scenes configuring itself as a DHCP server, handing out leases to other fabric devices, and then configuring them.
In addition the configurations are done with a PnP agent on the un-configured devices.
The additional fabric devices need to be completely factory reset.
line vty – transport input ssh, login local (if local username is needed – if not AAA needs to be configured)
ip ssh version 2
Turn on NETCONF
router(config)#netconf-yang
NETCONF/YANG with Python NCCLIENT:
NCCLIENT is a NETCONF Software Development Kit that operates in Python to assist with connecting to NETCONF Agents. After installing NCCLIENT via PIP, all that’s needed is for the library to be imported into Python scripts. – ‘from ncclient import manager’
Connecting to a NETCONF enabled IOS-XE device in Python requires using the NCCLIENT manager.connect option, host, port, username and password. This can be accomplished with a python with statement.
Above shows a script doing the following:
Importing the NCCLIENT Manager
Creating a dictionary specifying the router hostname, credentials, etc
Using a with statement referring back to the dictionary for credentials, etc
Creating NETCONF authentication into a variable that can be used moving forward
And printing all NETCONF capabilities with 50 ‘*’ in between each line.
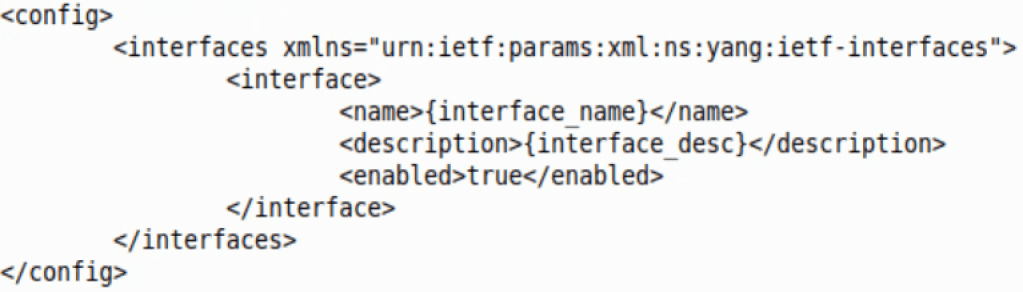
Making configuration changes on an IOS-XE device with NETCONF can be done with the NCCLIENT edit-config and a config template in a YANG model. Below is the IETF interfaces template in XML:
The template above can be opened in a Python script. With the Python format function, one can then fill in each ‘mustache’ as they see fit.
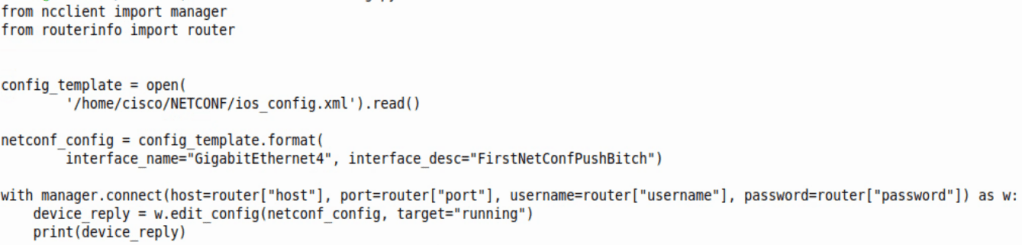
The script above does just that. From the top the script does the following:
Imports NCCLIENT Manager
Imports a dictionary with an IOS-XE router login/port/IP information
Opens the template called ‘config_template’ which allows us to change the interface description.
Changes the mustache variables to whatever is entered in “”
Adds the change to the running container, or running config.
Prints out the NETCONF reply, which is a simple ok
For clarity, the dictionary in the ‘routerinfo’ file looks like this:
RESTCONF:
REST – Representational State Transfer
REST APIs
Runs HTTP verbs like GET, PUT, POST, DELETE
Typically encoded in JSON or XML.
CRUD
Create
Read
Update
Delete
RESTCONF:
Uses HTTPS instead of SSH
Uses JSON primarily
Sessionless, stateless
Enabling RESTCONF in IOS-XE:
Enable SSHv2
username cisco privilege 15 password cisco
ip domain name mickx009.org
crypto key generate rsa modulus 2048
line vty – transport input ssh, login local (if local username is needed – if not AAA needs to be configured)
ip ssh version 2
Turn on RESTCONF
router(config)#restconf
ip http server
ip http authentication local
ip http secure server
RESTCONF/YANG with Postman
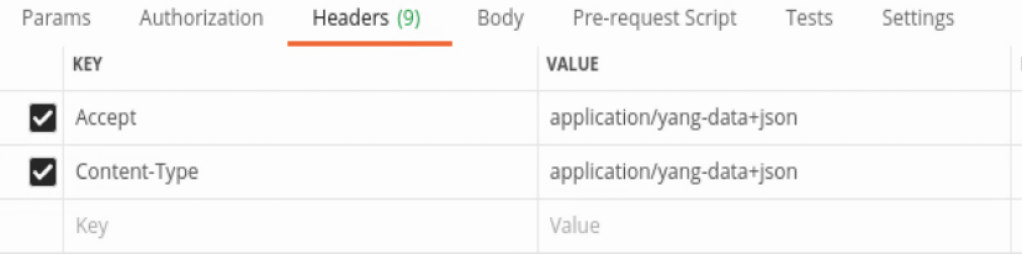
Connecting to a Cisco IOS-XE device with Postman requires the following:
Headers:
URL:
Notice we are going into the RESTCONF root and finding the NETCONF capabilities.
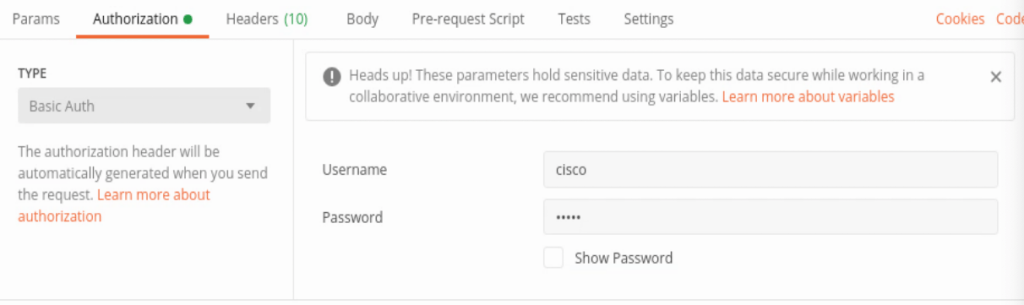
Authorization:
Notice the Basic Auth, username and password.
And when the GET request is sent, received in Postman is the list of capabilities below.
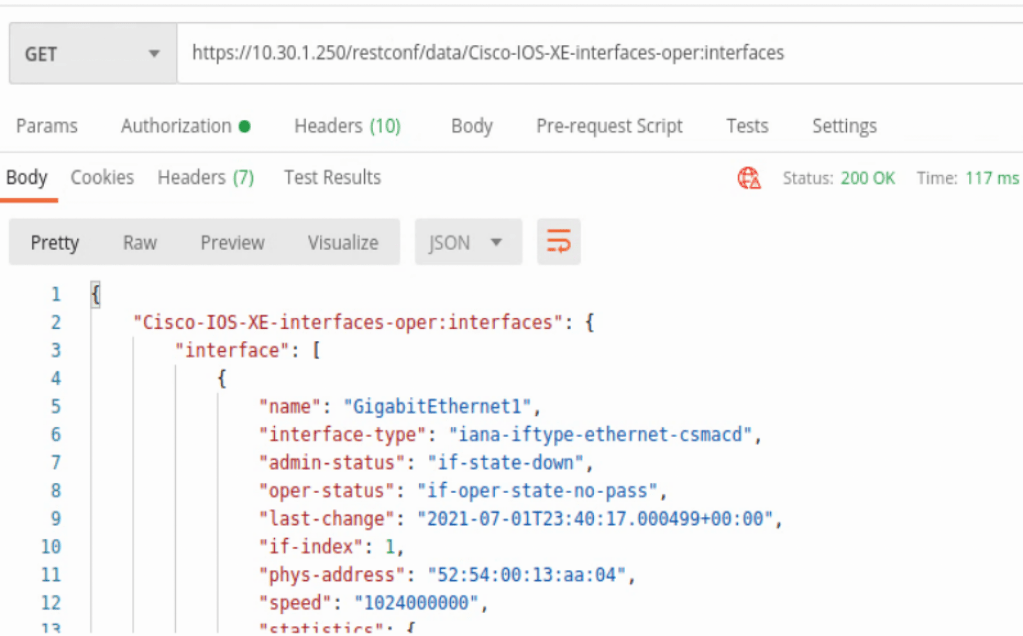
In the capabilities list the location /restconf/data/Cisco-IOS-XE-interfaces-oper:interfaces can be found. This will provide some detailed information about every interface on the IOS-XE device in JSON format.
Another interface example uses the location /restconf/data/Cisco-IOS-XE-native:native/interface/GigabitEthernet=<interface number>
This will zoom into a specific IOS-XE interface with some slightly different data.
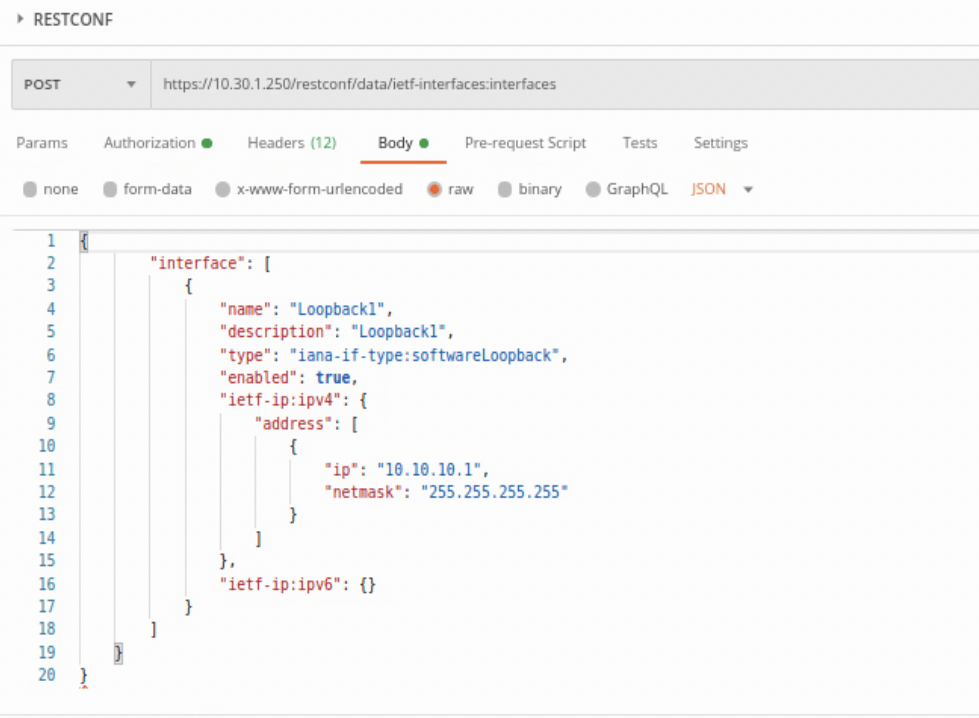
Those were all HTTP GET requests, but POSTS can be completed as well. All of the headers, authorization are the same, but now a body is needed to push to the device. Below is an example of adding a Loopback interface to the router.
Above we have changed the GET to POST, then added a body onto what’s being sent to the IOS-XE device. It’s easiest to run a GET, copy how the YANG model is formatted, then add and change as needed in the body. At least for a simple task like adding a Loopback interface to a device.
This was the IETF formatting, but Cisco has their own models as well that can be found under the capabilities list.
To remove the Loopback that was just created, the request type needs to be changed to DELETE and the URL needs to be zeroed into the interface. When creating the interface, the URL used was below:
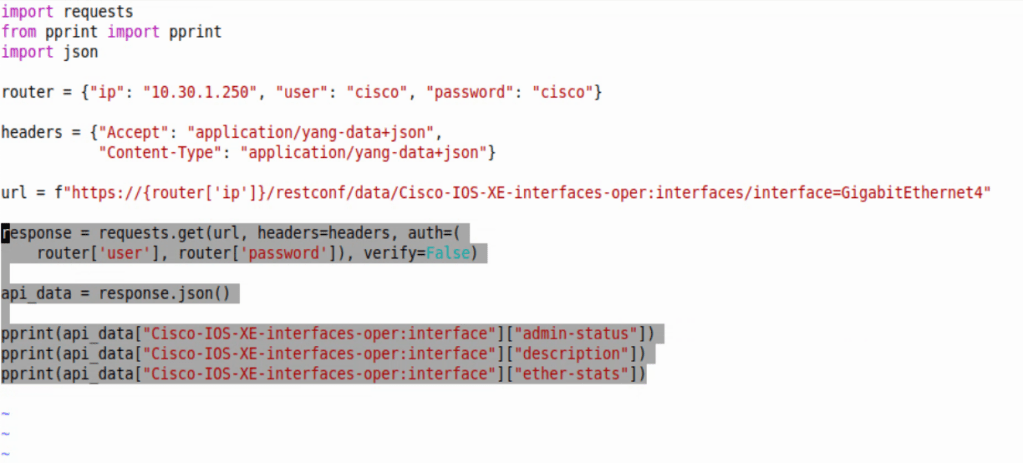
Connecting to an IOS-XE device with Python Requests is somewhat similar to connecting to other network devices via APIs. Requires the URL, headers, and creating response objects to gather and manipulate data on.
First we need to import requests, json, and pprint (optional), then create an object with the host IP and credentials.
Next we’ll throw in the following headers in dictionary format as well, just like the router object above.
Then we’ll do the RESTCONF URL. This one is a native Cisco IOS-XE call.
After those basic items are added to the script, we then need to create the HTTP request that’s referencing the above items. Below is a GET request that references the router, headers, and url.
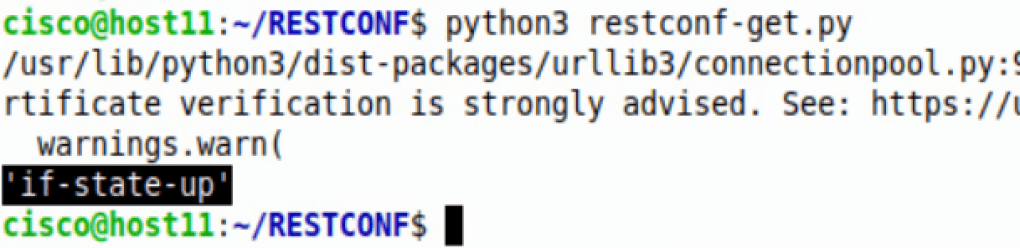
The response will be then formatted into a Python dictionary with the .json() addition, and then we’re printing the admin-status, description, and ether-stats.
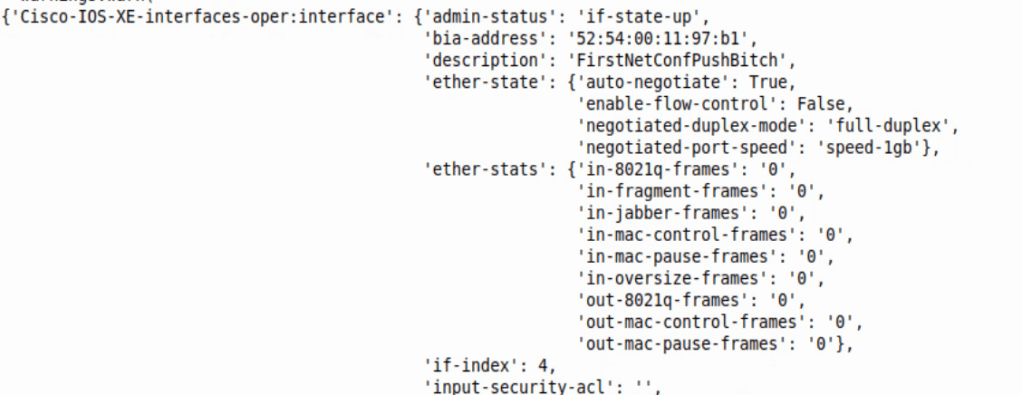
Converting to dictionary allows us to easily cherry pick key values we want to print to screen. Below is an image of just a pprint of api_data – ie. pprint(api_data) at the bottom of the script.
Adding the specific Keys to print can narrow down what we want back from the script – ie. pprint(api_data[“Cisco-IOS-XE-interfaces-oper:interface”][“admin-status”])
The HTTPS verification can be ignored. The response back was the value from Key ‘admin-status’.
On-change subscription with gRPC:
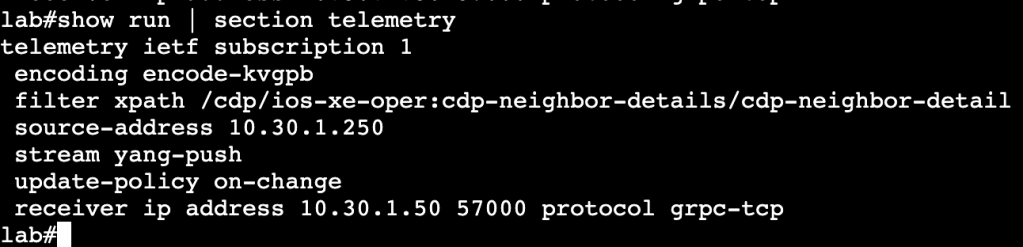
Enabling on-change subscription on an IOS-XE device requires below commands:
router(config)#telemetry ietf subscription 1 router(config-mdt-subs)#receiver ip address 10.30.1.50 57000 protocol grpc-tcp (or grpc-tls if TIG stack supports TLS) router(config-mdt-subs)#source-address <source interface IP where data should be sent from> router(config-mdt-subs)#filter xpath /cdp/ios-xe-oper:cdp-neighbor-details/cdp-neighbor-detail router(config-mdt-subs)#stream yang-push router(config-mdt-subs)#encoding encode-kvgpb
The above commands will allow an IOS-XE device to push streaming telemetry data to a TIG stack. The encode-kvgpb allows encoding for a TIG stack. The xpath is the xpath location where the switch is watching for changes. The update-policy on-change allows the switch to watch for changes to CDP neighbors and send that data to TIG if there are in fact changes.
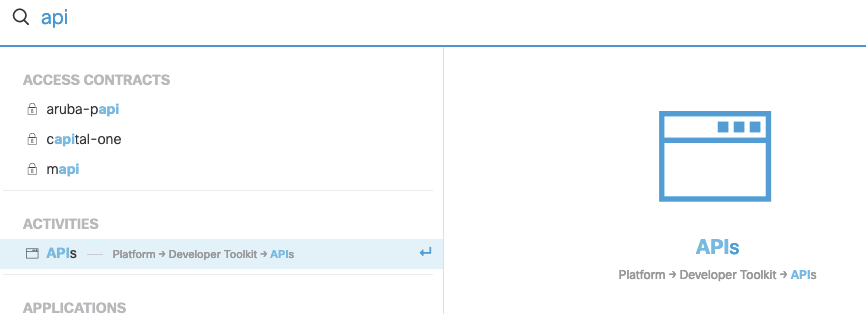
When leveraging DNA Center’s API with the requests library, the first thing that needs to be done is getting successfully authenticated. Lets first find the authentication endpoint within DNA Center’s GUI. Click on the search option in the top right corner of the homepage, then type in ‘API’.
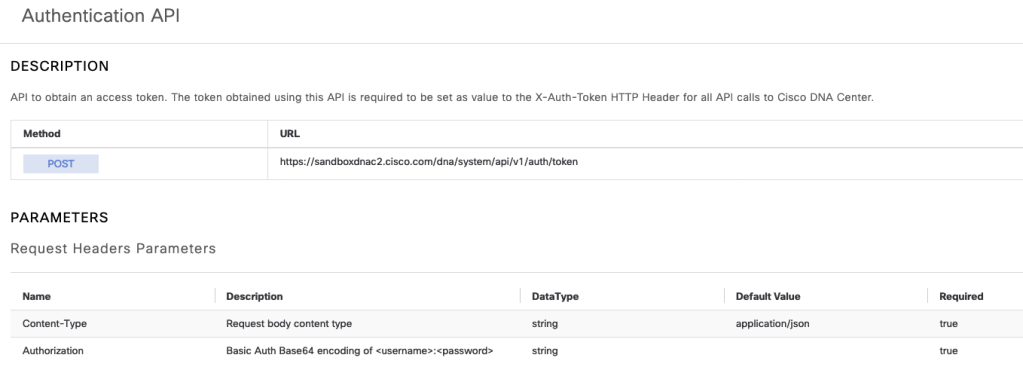
The very first API endpoint found in this section is for authentication.
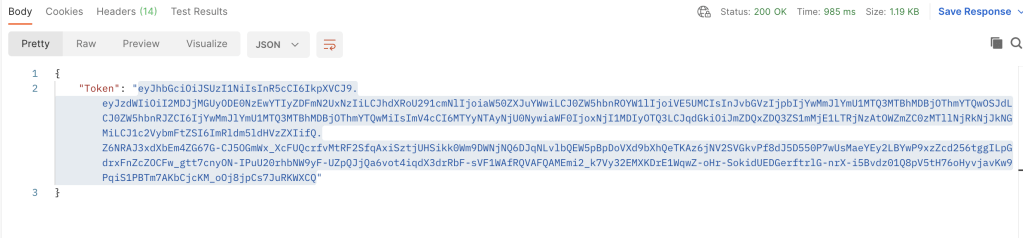
After sending a valid username and password, DNAC will respond with a token that can be used for the remainder of the session in the call headers. Below is a bit of Python that shows this in action.
The Token, pulled from the authentication response, is labeled ‘token’ and is added to the headers with “x-auth-token”. At the bottom is a print statement to print out the token, which verifies authentication works properly. From here on out additional API calls can be entered below to gather information from DNAC.
The above calls the network device list endpoint and prints the response in JSON format.
Postman:
Making API calls to DNAC with Postman is similar to the Python Requests method. We’re authenticating with Basic Auth, hitting the token API endpoint and receiving a Token. Moving forward that Token will be used to gather additional data from the API.
In the API documentation we’ll see that additional header variables need to be added.
The Authorization will be Base 64 encoding, which essentially just needs a string Basic with a space, then the string YWRtaW46TWFnbGV2MTIz. After hitting Send to DNAC, we’ll receive the needed Token, per below:
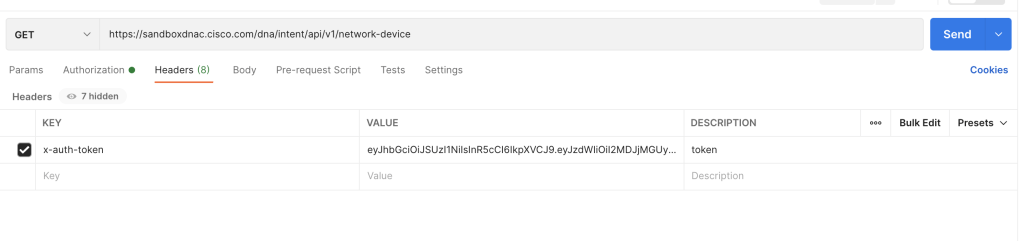
Now moving forward, this Token needs to be added as a variable to each API call to DNA Center. Below is an example of getting a list of devices from DNA Center with Postman.
x-auth-token added in request header, along with the actual token string.JSON response from DNAC
The process is very similar to Python requests library, but with a GUI that can give out code examples if needed.
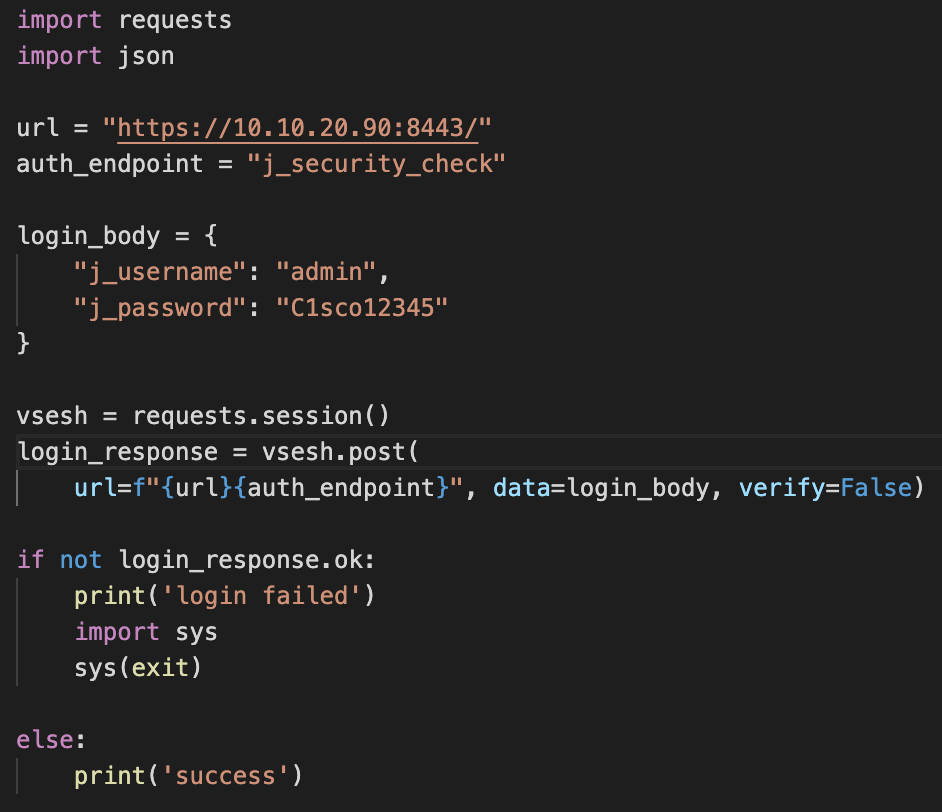
Authentication to vManage requires URL, username/’j_username’, password/’j_password’, ‘j_security_check’, and a session setup via token. The requests library can handle storing the token in a session for further GET requests.
The bottom is an if else statement printing to screen whether the authentication was successful.
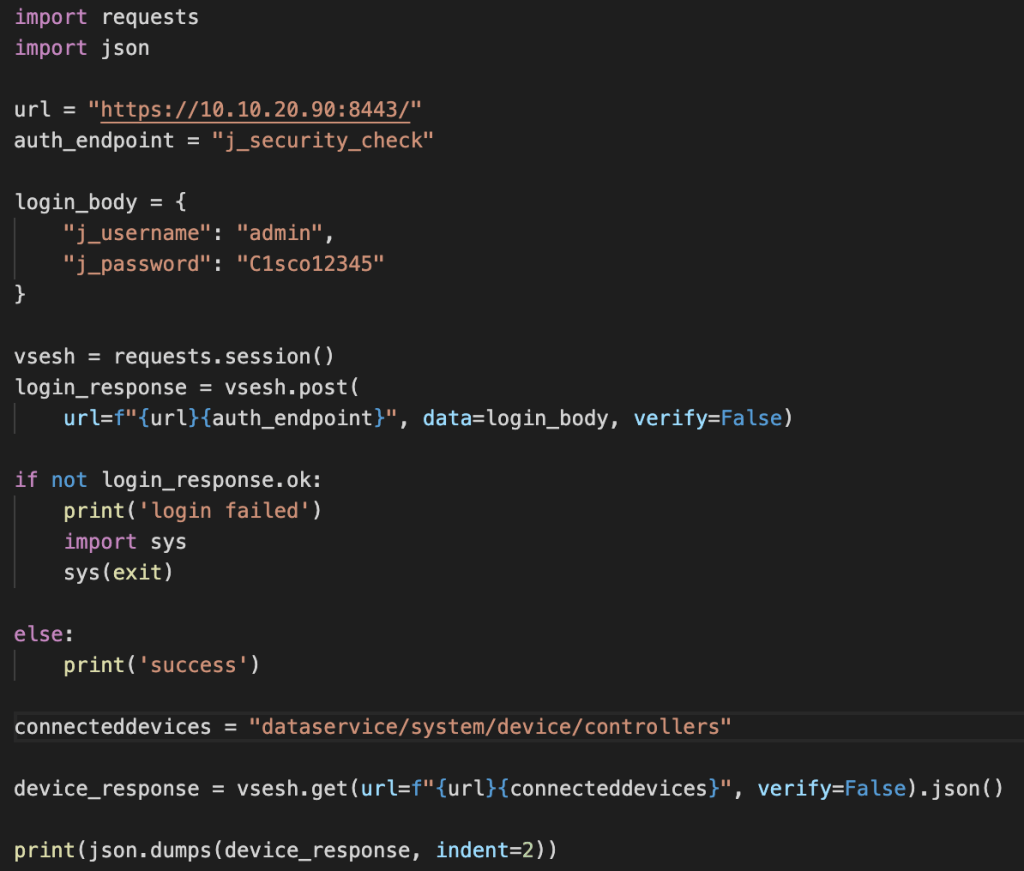
Once authentication is successful, the additional URL string can be added to gather information from vManage with the below code. The session, called vsession, will continue being used with a get (.get).
The device_response parameter has .json added to the end so that the data we’re getting back from vManage is in JSON. In addition, we’re using the json.dumps function to print the data on screen in JSON.
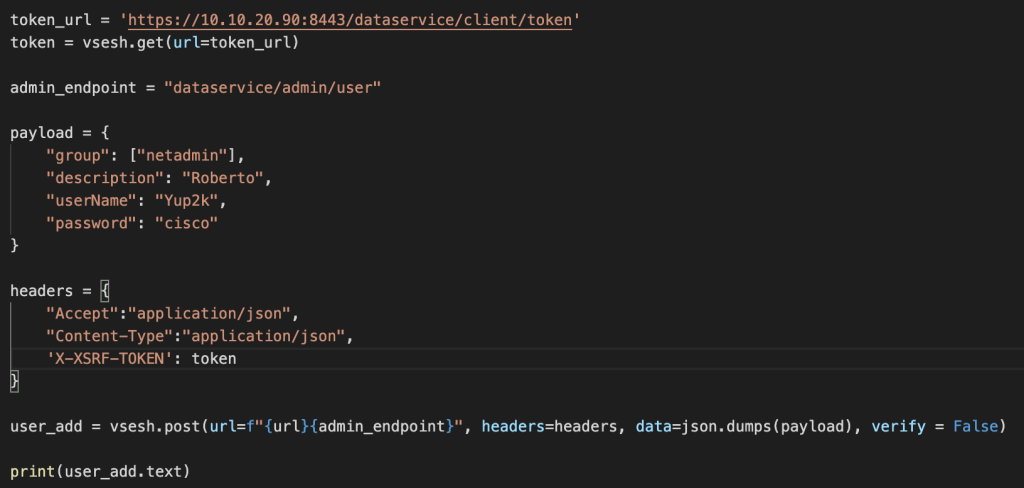
vManage firmware 19.2 moved towards requiring a token for each PUT/POST/DELETE request. Adding the token can be completed by requesting at the URL and adding to headers per below:
A post example of adding a new user account named ‘Yup2k’ is in the below image.
Postman:
Accessing the vManage API with Postman requires specific authentication parameters. Parameters are listed below:
Under Body:
Radio button x-www-form-urlencoded needs to be selected.
Key – j_username – Value – username
Key – j_password – Value – password
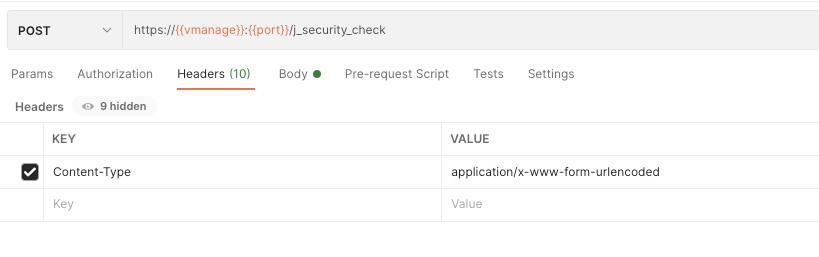
Under Headers:
Key – Content-Type – Value – application/x-www-form-urlencoded
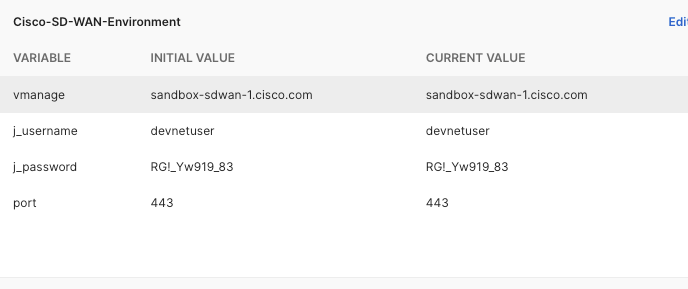
The last image above is a Postman environment setup, which will make interacting with the API via Postman faster.
The initial call needs to be a POST to the API endpoint <vmanage url>:<port>/j_security_check. Once this has been successful, additional calls gathering information or changing configuration can be completed.
Something to be aware of are cookies. A cookie can sit in Postman and expire after a while. If the message received after authentication is HTTP Method Post is not supported by this URL, try going into Cookies and deleting all of them.
IOS-XE Versions 16.6 and above come with Guest Shell.
Guest Shell is a virtualized CentOS environment.
Ultimately a container managed through Cisco’s IOx.
Enabling and Working with Guest Shell
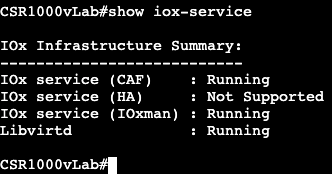
Enabling IOx environment
Confirms services are running
Once IOx is enabled, we need to configure network interface settings for the guest shell. We will first create a Virtual Port Group that will act as the gateway for guest shell. The port group will need to NAT traffic outbound for the virtual environment to reach the outside world (or just to reach IOS-XE).
Default Gateway for Guest Shell
Access List and NAT statement
Once NAT and gateway configuration has been completed, the vNIC settings will be configured under the app-hosting appid guestshell.
vNIC Configuration
And last but not least, the command to enable Guest Shell:
guestshell enable
Once the enable command has succeeded, the command ‘guestshell’ is all it takes to reach the linux prompt.
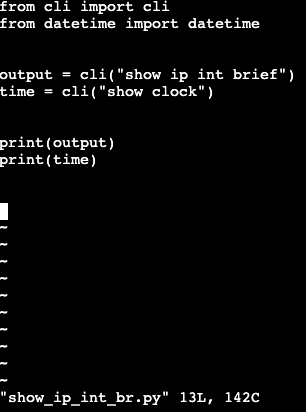
The Guest Shell will out of the box have Python2.7 installed. In Python you can create scripts with vim, specifically with the ‘cli’ module, to interact with the command line. Below is a basic script that will display a show ip int brief.
Once exited out of the Guest Shell and on our typical IOS-XE CLI prompt, you can run this script with the following:
Once it’s confirmed the command ‘guestshell run python’ will work from IOS-XE, it’s very simple to use EEM for a python script to run after specific events happen.